Tuesday, October 25, 2011

Lasagna Roll Ups


After a not so wonderful attempt at making curried chick peas the other day (I decided against blogging about them...and I was lazy lol) it was refreshing to have made something so easy and yet so spectacular today!!


We've been eating fairly vegetarian lately and it's been interesting.  I miss meat and potatoes but a budget is a budget.  The chicken needs to last us for a little while longer and we only have two breasts left.


Anyway, these lasagna roll ups are fantastic!!  They don't take up much room, are super easy to make, and were extremely filling.  The best part?  We only used 6 lasagna noodles to make this as opposed to using a whole box to make the traditional lasagna...and they tasted the same!


So with my highly recommended dish comes the recipe:
Ingredients
serving size: 2

  • 6 Lasagna noodles
  • 15 oz ricotta
  • 1 cup shredded mozzarella
  •  1/4 cup Parmesan
  • 1 egg
  • 10 oz frozen spinach
  • marinara sauce
  • salt and pepper to taste 
Instructions:
1: Get a large pot of water boiling with a dash of salt. When it comes to a full boil, add the lasagna noodles and cook for about 12-15 minutes. When they are finished cooking, drain.

2: While the noodles are boiling, prepare the filling. Thaw the package of frozen spinach in the microwave and then squeeze out as much excess liquid as possible. Combine the spinach in a bowl with the ricotta, mozzarella, parmesan, egg, freshly grated pepper and about 1/4 tsp of salt. Mix until well combined.

3: When the noodles and filling are ready to go, preheat the oven to 400 degrees. Prepare a glass casserole dish by spraying with non-stick spray.

4: On a clean surface, lay out a few noodles at a time. Place a few tablespoons of filling on each noodle and spread to cover from edge to edge. Make sure to spread it all the way to the edges of the noodles.

5: Roll the noodles up and place in the prepared casserole dish. Repeat until all of your filling is gone. Pour the marinara sauce over the rolled noodles making sure to cover all surfaces. The sauce will keep the noodles hydrated and soft while baking.

6: Cover the dish in foil and bake for 30 minutes.


If you want to see this recipe in pictures, head over to budgetbytes where I originally got the recipe.


Highly recommend!!

Saturday, October 22, 2011

Chicken Divan & Fried Rice

Of course the schedule was shot to crap right off the bat but oh well, it's still good to have a plan and hopefully as we go along it'll be easier to stick to it.  I didn't have time to post yesterday so I'll do two dishes in one entry: yesterday's and today's.  And...per usual, the schedule is off but the rest of the dishes should be making an appearance at some point this week, except one.


Chicken Divan


One of my favorite meals from Ohio.  I made it once before a few years ago but never on my own...and it's actually quite simple!  It uses a lot of ingredients but most of them are standard things you'd have laying around the house.  The only thing we needed to get to make this dish was cream of mushroom soup (which we found at the dollar store--yipee!!)


Ingredients
Serving size: 2

  • 1 TBSP oil
  • 2 boneless, skinless chicken breasts
  • 2 cups broccoli
  • 1 can cream of mushroom soup
  • 1/4 cup milk
  • 1/4 cup mayonnaise 
  • 1/8 tsp curry powder
  • 2 tsp lemon juice
  • 1/4 tsp black pepper
  • 1/4 cup bread crumbs
  • 1/2 cup cheddar
Instructions

1. Salt and pepper the chicken breasts and saute until done, turning in the pan to cook evenly. Cut each breast into half or thirds.

2. Cook the broccoli in boiling water for 2-3 minutes, then drain.

3. Spray or oil a 9x9 pan, add the broccoli, then add the cooked chicken pieces on top.

4. In a small bowl, mix together the soup, milk, mayonnaise, curry powder, lemon juice, and pepper. Spread over the chicken and broccoli. Sprinkle the cheese on top, then sprinkle the bread crumbs on top of that.

5. Bake at 350 for 20 minutes.


Super yummy and works well as comfort food!  Always a favorite at home


Fried Rice


An amazing meal when you're feeling lazy and want something yummy and easy to make.  However, I can't take credit for this, Garry did most of the work.  I was going to but he had to scramble the eggs and just kinda kept going from there.  Either way, it's an easy dish and wonderful when you have left overs/items you dunno what to do with.  Like us?  We had carrots for awhile and didn't know what to do with them...throw em in the fried rice!


I don't really have measurements for this one because we really just threw stuff together.  So...basically take the following ingredients and throw them together (or whatever else you'd like to add)


Ingredients
Serving size: 2-ish

  • 1 1/2 cups rice
  • green onion
  • carrots
  • soy sauce to taste
  • scrambled eggs
  • garlic powder to taste
Walla!  We would have added peas but we didn't have peas...and like I said, you can add whatever you want.  We would have added more but we didn't have anything more to add.  And it was surprisingly filling :)  Great vegetarian dish on a budget!

Wednesday, October 19, 2011

Menu Oct 20-27

After doing some budgeting (and a surprise extremely low electricity bill yay!) we actually realized we have enough money if we're careful to feed ourselves the next two and a half weeks.


I know I didn't really stick to the menu last week but so much craziness was happening!  This week is much calmer so hopefully things will stay to the plan!  (there may be a day or two that get's thrown off because my dad is coming to visit)


Thursday Oct 20
Chicken Divan 


Friday Oct 21
Tuna Stuffed Shells


Saturday Oct 22
Lasagna Roll Ups


Sunday Oct 23
Fried Rice


Monday Oct 24
Curry Chickpeas over rice


Tuesday Oct 25
Baked Pasta


Wednesday Oct 26
Tuna Lasagna


And with my careful planning our shopping list only consists of:

  • Ricotta
  • Mozzarella D
  • Spinach Opt D
  • Celery Opt
  • 2 cans of cream of mushroom D
  • soy milk D
  • Pasta D
  • Chickpeas
  • cottage cheese 
Again, the D means things we can get at the dollar store and opt means optional.  I'm hoping to only spend $15 max today but hopefully we'll be able to come in under that goal.

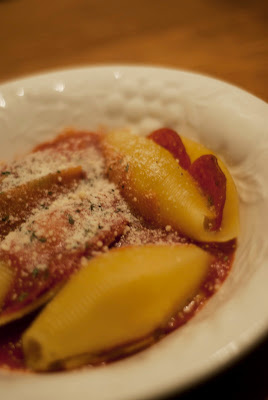
Pizza Stuffed Shells


It was an interesting day today...Garry was at work and I had no idea what to make with the few supplies we had left.  I was browsing through some ideas and came across this one...pizza stuffed shells.  Sure, why not?  Only problem was I had no recipe...this was from my own head.  So I very tentatively began to cook.


The results?  Really good actually! 


Since this was from my brain I was kinda winging it and I don't know exact measurements but I'll do my best to guesstimate.


Ingredients
Serving size: 2

  • 6 jumbo stuffed shells
  • 1/4 cup mozzarella 
  • 1/4 cup cheddar
  • 1/4 cup milk
  • 1 egg
  • 1 TBSP flour
  • 1 tsp black pepper
  • 1 tsp nutmeg
  • 12 slices of pepperoni
Instructions

1. Cook the jumbo shells as directed on the package

2. In a skillet, mix the two cheeses and the milk together, using a whisk on medium heat.  Let the mixture bubble for a minute to thicken the sauce.

3. In a separate pan crack the egg and mix together the black pepper and nutmeg.  Once the cheese mixture is thick, mix it together with the egg, black pepper, and nutmeg.

4.  Once the mixture is a sauce, add the flour and whisk together.

5. Pick up each shell and use a spoon to put the cheese sauce into the shell (2 scoops is plenty) then place two pepperoni into the shell.  

6. Place each shell on a baking pan.  Heat the oven to 350

7. Cook the shells for 10 minutes and then remove.  Serve with tomato sauce, Parmesan, and basil

Yummy!  My own creation too...I was absolutely improvising for the fact that we had no ricotta-eep!

Sunday, October 16, 2011

Mac N Cheese


It's mac and cheese day!  Who doesn't love good, homemade mac and cheese?  I'll admit though, I do love out of the box...but that gets expensive...and it doesn't taste as good as the real thing.


Ingredients
Serving size: 6

  • Butter (4 TBSP)
  • Milk (2 1/2 cups)
  • Flour (1/4 cup)
  • Salt
  • Nutmeg (1/8 tsp)
  • Black Pepper (1/8 tsp)
  • Cayenne pepper (1/8 tsp)
  • Cheddar cheese (3 cups)
  • Mozzarella cheese (2 cups)
Instructions

1. Preheat oven to 375 degrees and butter/spray a casserole dish

2. Boil pasta as directed on the package

3 In a medium saucepan set over medium heat, heat milk. In the same pot you used for boiling the pasta, melt remaining 6 tablespoons butter over medium heat. When butter bubbles, add flour. Cook, whisking, 1 minute.

4. While whisking, slowly pour in hot milk. Continue cooking, whisking constantly, until the mixture bubbles and becomes thick.

5. Remove pan from heat. Stir in salt, nutmeg, black pepper, cayenne pepper,cheddar cheese, and mozzarella cheese

6. Pour mixture into prepared dish. Sprinkle remaining cheddar cheese and breadcrumbs over top. Bake until browned on top, about 30 minutes.


Yummy mac and cheese for a comfortable night in!  And we made 6 servings so we can eat tomorrow since I won't have time to cook :-S

Saturday, October 15, 2011

"Asian Sticky Wings"


"asian sticky wings": my version?  Not sticky and not wings...but still incredibly delicious!


It was an interesting cooking day today.  I'll first post my method of making these chicken breasts (since I have a peculiarity where I hate eating chicken on bones) and then talk about what exactly happened.  They turned out great and filled the house with an amazing smell...but it didn't come without it's problems.


Also, you can click on the link to go to the original recipe whenever you want...my way is almost nothing like her's...only because I hit a snag in the cooking process.


Ingredients
Serving size: 2

  • Chicken Breast (1-2)
  • Honey (1/8 cup)
  • Soy Sauce (2 TBSP)
  • Chili Powder & Garlic (1 TBSP)
  • Oil (1 TBSP)
  • Teriyaki Sauce (2 TBSP)
  • Vinegar (1 TBSP)
  • Ginger (1 TBSP)
  • Green Onion (1 sliced)
Instructions

1. Mix the honey, soy sauce, chili powder/garlic, oil, teriyaki sauce, vinegar, and ginger together in a bowl using a whisk until they are all blended together in a sauce

2. Put the chicken and the sauce in a baking pan and cook at 450 for 20-25 minutes

3. Make another batch of sauce while the chicken cooks

4. After the chicken is cooked, put on a serving plate and pour the rest of the sauce over the chicken

5. Cut the green onion and sprinkle on top

Fair warning: you may end up with black tar crap on your baking dish.  I know I did...and that's where my problems happened.  Unfortunately our baking dish is much too big for the chicken.  To save on the chicken I only used one breast and cut it in half.  Putting that small breast into a large pan=sticky crap everywhere.

After 20 minutes in the oven I opened it up and smoke FILLED the kicthen, setting off the smoke detector (which was promptly turned off).  Thankfully the chicken was alright, but because the sauce spread all over the rest of the pan, it began to bake to a crisp.  Not good.

So in order to fix this, I took the chicken out of the pan (and quickly threw the pan in the sink and filled it with water...hopefully soaking for a few hours will make the cleaning process less awful) and created another batch of sauce to pour over the chicken.

While the sauce was runny, it made for an EXCELLENT decision.  I made my mashed potatoes and the sauce mixed with them, added flavor to the chicken, and was overall amazing to have laying all over the plate.  It would have been amazing over rice as well, for sure.

So while mine ended up nothing like the original recipe it still came out INCREDIBLE.  I'm honestly craving more now.  Though next time I think I'm going to cook the chicken in a sauce pan over the stove with the sauce and see what happens.  Hopefully it'll be more rich and thick like it was supposed to be in the first place.

Wednesday, October 12, 2011

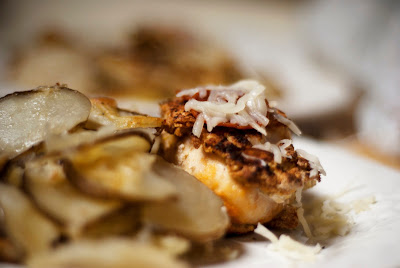
Pepperoni Stuffed Chicken & Scalloped Potatoes


It's been a few days!  We went to eat at Garry's dad's house on Monday then yesterday we decided to go out to eat for our anniversary since Garry had the day off.  But now I'm back to cooking until the last week of October when I go out to eat with dad sometime.  So...as you can imagine the schedule's all out of whack but that's alright.  The food we got will last longer so we can really cut back on next week's spending to make up for eating out (and splurging $20 to get 5 DVDs from Blockbuster)

Anyway!  Today we had a feast and it was wonderful!  We had Cesar salad, garlic toast, (which Garry prepared), pepperoni stuffed chicken, and scalloped potatoes.  Yummmm.  Of all that I'm just going to feature the chicken and potatoes...because they were both super easy to make and super delicious


Pepperoni Stuffed Chicken
Serving size: 2
Ingredients

  • Chicken breasts (1 breast)
  • mozzarella cheese
  • pepperoni (as many as you want)
  • egg (1)
  • Flour (1/4 cup)
  • Bread Crumbs (1/4 cup)
  • Oil (6 tbsp)
  • Salt & Pepper
The directions are a bit difficult to follow (or they were for me) so I'm going to post the link to the recipe itself since the author was kind enough to post pictures underneath her explanations of how to make this.  Clickity click here to see!

Scalloped Potatoes
Serving size: 3
Ingredients
  • Large potatoes (3)
  • Chopped (or minced) onion (1/4 cup & 2 tbsp)
  • Butter/Margarine (1 tbsp & 1 1/2 tsp)
  • Flour (2 tbsp)
  • Chicken broth (3/4 cup & 2 tbsp)
  • Mayonnaise (1 tbsp)
  • Salt & Pepper
  • Paprika 
Directions
1. In a greased 2-1/2-qt. baking dish, layer potatoes and onion. 


2. In a saucepan, melt the butter; stir in flour until smooth. 


3. Gradually add broth, mayonnaise, salt and pepper; cook and stir for 2 minutes or until thick and bubbly. 


4. Pour over potatoes. Sprinkle with paprika. 


5. Cover and bake at 325 degrees F for 2 hours or until tender.


There you have it...easy peasy and delicious (not to mention filling)!  Let me know if you have any questions and I'll do my best to answer.

Sunday, October 9, 2011

Shopping & Gnocchi


I made the ricotta gnocchi today and have mixed reviews on it.  I made them with some alfredo sauce I made from scratch and it was...decent.  I was really excited about this today so I'm a little bit disheartened but it wasn't a flop by any means.  I think I just didn't use enough flour so the gnocchi came out with a weird texture.  The alfredo sauce was alright, I probably should have used more spices in it's creation.  Either way, I suggest you try your hand at gnocchi...it's easy to make (but it's messy!) with a lot of basic ingredients.


Gnocchi
Ingredients:

  • Ricotta cheese (15oz container)
  • egg (1)
  • olive oil (1tsp)
  • flour (2 cups)
  • salt (3/4 tsp)
  • pepper 
Instructions:
1. In a medium bowl, whisk together the ricotta cheese, olive oil, egg, salt, and freshly cracked pepper.

2. Add the flour, 1/2 cup at a time, until it forms a soft sticky dough (about 1.5 cups)

3. Begin boiling a large pot of water. Turn the dough out onto a floured surface and knead in about another 1/2 cup of flour or until the dough no longer sticks to your hands. The dough should still be very soft in texture.

4. Divide the dough into six pieces. Roll each piece out into a rope about 1 inch thick. Cut the rope into 1 inch sections. If desired, roll each piece of dough on the back of a fork to give it a ridged texture.

5. When the water is boiling vigorously, drop the dough pieces into the water. As the gnocchi boil they will begin to rise to the surface. Once all of them are floating on top, let them boil for about 30 seconds to one minute more to ensure thorough cooking. Drain in a colander.


Alfredo Sauce
Ingredients:

  • Butter (2 tbsp)
  • cream cheese (1/3 cup)
  • Milk/Whipping Cream (2/3 cup)
  • pinch of nutmeg
  • pinch of pepper
  • Parmesan cheese (1/3 cup)

Instructions:
1. Melt the butter. 


2. Stir in the cream cheese while stirring with a wire whisk. Add the milk slowly, stirring constantly. 


3. Bring just to a very low simmer and cook a few minutes. 


4. Stir in the nutmeg and pepper. Add the Parmesan, stirring until melted. Cover and let sit until your pasta is done.

The beauty of gnocchi is that it goes with anything...if you don't feel like making your own sauce then you can throw them into the skillet with some butter and garlic or you can put tomato sauce over them...you can do pretty much anything.  I'll be making these again soon--with more flour--and hopefully will have more tips on how to keep the texture from being a bit...off.  


Now onto shopping!


It was a success today...we ended up spending $30 in total and would have been under that by about $5 had we not spent the money on a dozen bagels (but they will last us awhile).  Otherwise it was really good!


We found MOST of what we needed at the dollar store which I was super happy about.  We only spent $9.16 there for 9 items of our 14 item list.  Super win.  The rest we went to Winco for and I'm happy we did!


Green onions were $0.78 for a bundle
Bread crumbs were $0.98 for a HUGE can that will last months
Ricotta was $2.47
A 2.5 lb bag of chicken breasts were $4.78...win here.  They will last us the rest of the month
Ground beef was $2.38 for our Taco Night
and Jumbo Shells were $2.19
Those with the bagels were $18.96
Add the $9.16 from the dollar sore onto that and our grand total for the week was...


$28.12!


SUPER stoked...while the entire week we'll be spending $48 on food thanks to eating out, it actually gives me hope that we CAN eat well and still have some money left over in the end.  Next week I anticipate we'll spend about this much if not less thanks to the bargains we got today--such as with the chicken and green onions.  Eating apparently can happen if you know where to look and plan wisely :)


One last thing before I take off: we never made it to Garry's dad's house yesterday for lunch so we're going over there tomorrow.  Everything on the menu will be pushed back so the pepperoni stuffed chicken will be on Tuesday, pesto stuffed shells on Wednesday, eating out Thursday, then the schedule will remain the same...although I MAY not do the lasagna roll ups this week because I used the ricotta today...but we'll see.  I may do fried rice or something like it.


Just wanted to make you aware of the changes :)


Have a good day and enjoy your gnocchi--when you get to it ;)

Saturday, October 8, 2011

Menu Oct 9-15

Rather than posting again tomorrow (because we're probably just going to have salad or a sandwich) I decided to post the menu for Oct 9-15th along with the shopping list and the ultimate goal


Sunday
Ricotta Gnocchi with Homemade Alfredo Sauce & Garlic Bread


Monday
Pepperoni Stuffed Chicken & Mashed Potatoes


Tuesday
Pesto Stuffed Jumbo Shells & Garlic Bread


Wednesday
Asian Sticky "Wings" (though I'm going to use breasts) and Scalloped Potatoes


Thursday
Out to eat at BJ's Restaurant for our anniversary!


Friday
Taco Night


Saturday
Lasagna Roll Ups & Garlic Bread


With this menu our shopping list consists of:

  • ricotta D?
  • cream cheese D?
  • nutmeg
  • chicken breasts (4)
  • pepperoni D
  • sesame oil
  • ginger D?
  • green onions
  • tomato sauce D
  • lasagna noodles D
  • ground beef
  • jumbo shells
  • garlic bread D
The master plan is to save as much money as possible, especially since we'll be spending $20 on our anniversary dinner at BJ's.  I would love to only spend about $20-30 on the shopping trip and hoping it works...

Those with D? are things I think the dollar store might have and those with a D are those I know the dollar store has.  Each item we find at the dollar store is like a little win for me...it's spending $1 on something that would otherwise cost $2-5...HUGE money saver.  Best case scenario is the dollar store has most of what we want...they won't have the meats, I know that.  But they still have a massive amount of food.

For the meats we're going to go check out Winco...Garry's cousin clued us in on where to go shopping for the cheapest grocery items.  He said Winco has the cheapest meats.  Granted, if we go over our budget this week we'll cut out meat entirely from our diet until we can afford it.  Hoping that doesn't happen but we'll see what kind of deals Winco has.

For produce we're going to go to Food 4 Less...like I mentioned before, we went walking around one out of curiosity and found the prices several dollars lower than at safeway. Hopefully by shopping here as opposed to safeway, we'll save more money.

Many people have mentioned couponing to me and while I'd love to say I'm on board, I just can't manage to find coupons on anything worth buying.  I don't need cereal and soup...I need coupons on chicken and tuna and lettuce...so...until I can really figure that out, coupons aren't going to happen...unfortunately :(

I'll post more on Sunday about the shopping trip, how it went, the plan from there, along with the gnocchi I'll be making.

Day Off

No cooking today, Garry's dad invited us over.  I was just going to make salads anyway so it's no big loss.  Sunday will be here soon and I'll start to really cook and post recipes!

Friday, October 7, 2011

Kat's Chunky Cheesy Mashed Potatoes


Surprise!  No beef today.  I actually started the potatoes, pulled out the beef and it smelled...funky.  I took it over to Garry who smelt it and immediately said it was bad.  So...plan B.


"We have turkey in the fridge..."
"What kind of turkey?"
"Lunch meat....we'll just have sandwiches and mashed potatoes"


I assume everyone knows how to make a sandwich so today I'm going to focus on the potatoes...which are insanely easy too but I made them without any recipe at all.  I just threw things together...so I can give you a list of what I used in the mashed potatoes but no measurements because I was pretty much just eye balling it the whole time.

Thus I dub thee: Kat's Chunky Cheesy Mashed Potatoes


Ingredients

  • Potatoes
  • Milk
  • Whipping Cream
  • Cheese
  • Butter
  • Minced garlic
  • Minced onion
  • Black pepper
  • Salt
Instructions
  1. Cut up your desired amount of potatoes into chunks and throw them into a pot.  Cover them with water and bring to a boil.
  2. Turn the heat down to medium and let the potatoes cook for 10-20 minutes, occasionally poking them with a fork to gage softness.  Once they are your desired softness, drain them.
  3. Add the milk, whipping cream, cheese, butter, garlic, onions, black pepper, and salt into the potatoes.
  4. In order to make the potatoes chunky (because I prefer them that way and because we don't have anything better) use a fork and begin smashing the potatoes and mixing the ingredients together
Tada!  You have yourself some delicious garlic, cheese, creamy, chunky yummy potatoes of deliciousness!  


I apologize again for not having measurements, I was pretty much caught off guard by the beef going bad and I've made potatoes enough that I didn't need a recipe.  In the future though I will provide you with measurements.  If you absolutely require them just let me know and I'll do my best to give them to you


Until tomorrow, bon appetit!

Thursday, October 6, 2011

Chicken A La Fail


Well, day one is getting off on a really bad foot...I found this recipe for glaze on pork loins and wanted to try it on chicken because it looked good.  I guess that was my first mistake.  I should have done it with beef.  But my real mistake was letting the brown sugar cook too quickly.  So rather than having a spicy caramelized awesomeness I got...burnt...crap...


The picture, as unappetizing as it looks, makes it look 100 times better than it tasted.  I ate maybe 1/10th of it and had to stop...it just tasted like...burnt crap.


Needless to say I'm disappointed with myself right now...I know I can do better and I have...but I'm trying to remind myself that this is a learning experience.  I guess I'm just disappointed because my blog's first day didn't turn out glorious with a wonderful recipe or anything...but I guess that's pretty descriptive of life.


Garry ate it all though...but to save me from starvation he made me a tuna sandwich...I love that man so much


So I won't even bother putting the recipe for this...just a word of warning...make sure you pay attention when you're cooking brown sugar. 


In good news, I do have all next week's meals planned out!  To save money we're having beef one night and chicken one night...the rest is vegetarian dishes.  I'll post my week's dishes on Saturday then on Sunday we're going shopping (budget is MAX $50 but $20-30 would be superb) and I begin cooking and then real magic happens.


Tomorrow's dish is also a mystery to me...I know it will include beef and potatoes of some kind but that's it.  We'll see...hopefully it goes better than today's!

Wednesday, October 5, 2011

Keeping Organized


I spent the last few hours getting together recipes I've been finding online that include a lot of the same ingredients.  Even ingredients I have never heard of or used personally I decided to go ahead and write down anyway and found there were many things that could be done with it!


So how to keep organized?  

I hastily asked Garry if he had any unused notebooks around and he handed me one.  I quickly created tabs to glue onto the notebook to separate the different recipes: Pasta, Chicken, Beef, Turkey, Tuna, Pizza, Sides, Salads, and Sandwiches


I then decided the best thing I could do for myself to save the most money and create the best grocery list was to write down the name of the recipe and the ingredients it required.  This way I could flip through my notebook and see common ingredients used, for example: yellow onion.  I have about 10 different recipes that include yellow onion...if I find 3-4 of them for that week, I can make good use of the yellow onions rather than spending the extra money on a variety of ingredients for that week.


I then saved the recipe onto my favorites list for later viewing rather than writing down the entire recipe.


Psssst.  I'm really wishing hard for a recipe binder/notebook this Christmas so I can keep track of them all and just whip 'em out whenever I want rather than looking online and scribbling down something quick before cooking.


As far as planning meals for each day I have only come up with writing them down on paper first then writing them up on our dry eraser calendar board we have in the kitchen, along with posting them here each week.


Needless to say I'm super excited about going grocery shopping on Saturday/Sunday (probably will be Sunday) and beginning to really plan!  


I think I found a good recipe for tomorrow as well to make use of the last chicken breast we have...but it's a secret until tomorrow!  Hopefully it'll be delicious :)

The Beginnings

Since I moved to California a month ago, my diet mostly consisted of pizza, fast food, beans, and pasta.  I got tired of it...my health was suffering.  Not to mention Garry's genetically programmed to have all kinds of awful health problems that I want to avoid as much as possible.  I knew the only way to make this happen was to make food a priority.  


The problem is mainly working on a low budget.  $200 for the month MAX.  I know we can do it...especially now that we have some basics in our kitchen.  It's going to take some research, planning, and creativity but I know we'll be eating better on such a tight budget.


The last two weeks I've been cooking on and off and just recently began taking pictures of the food.  Now I'm doing more research into designing meals for cheap and learning how NOT to give into the urge of "I don't feel like cooking, let's go out tonight".  I think better organization will prevent this from happening in the future.


The plan of action?

  1. Find a bunch of meals that are cheap and only require basics to make  
  2. Assign each of those meals to a day so there's more expectation of what's to come on that day...to fend off "let's go out" cravings
  3. Shop weekly for any ingredients we may need--this is just to start off and see how it works
  4. Cook more vegetarian meals to save on meat costs; we will only have meat 2-4 times a week
I also have a plan of action for the stores we're going to be shopping at.  While we have a membership card at Safeway, it's cheaper for us to first go to the Dollar Store and get whatever basics we need (such as spices...they have SO many spices for only $1 while Safeway sells them for $3-5!)  They're really good about having the most necessary basics like bread, spices, flour, corn starch, and sugar.  

Whatever we can't get there or find a better deal on elsewhere will be bought at Food 4 Less or Safeway.  The other day we stopped into Food 4 Less to see what it's all about and the prices were significantly lower than Safeway!  So I want to experiment with Food 4 Less for right now...but Safeway is third in line right now.

Of course all of this is probably going to drastically change as I go.  I'm brand new to cooking for myself every day let alone budgeting on top of that.  But we all gotta start somewhere and this is my game plan.  And this blog is here to 
A. Inspire me to keep going with this and not just say "screw it" and get mcd's every night
B. Learn more about food, flavor, budgeting, ect.
C. Share anything I learn with everyone else to make cheap, delicious, and better-than-fast-food meals

Grocery shopping begins Saturday.  My blog starts tomorrow...what's on the menu?  Who knows.  We have a bit of beef, tuna, a chicken breast, 3-4 potatoes, a cup of rice, bread, spices, tomato sauce, eggs, and oil to work with...we'll see what happens!

Also!  I plan on the beginning of every week telling what exactly is on the menu for each day so I can stick to my goal but also so anyone reading knows what to expect for that week and can make sure they check out a certain day that looks especially yummy :)

Bon Appetit!